

Spring Butterfly and Daisy Sugar Cookies
- Mar 18, 2018
- 4 min read
Spring Butterfly and Daisy Sugar Cookies

Last spring I made these sweet Spring Butterfly and Daisy Sugar Cookies for my daughter for her birthday. She and her husband were excited about these and wanted to help decorate so that made me very happy! We had a great day decorating together and visiting.
I was thinking that these would make some pretty beautiful Easter cookies and a fun family project for the holiday as well. They could be bright like these or a more pastel theme if you like but I really like the combination of the two patterns together.
Cookies like these are not made in one day, so I made the dough the night before baking the cookies and let the flour bloom and everything get cozy overnight in the fridge. (day 1)
I've researched many sugar cookie recipes and I've come to a compromise. The recipes that make the cleanest sharp edged intricately designed cookies do not make the tastiest cookies. The rich, chewy sugar cookie recipes taste great but do not make the prettiest cut outs because they are too puffy and the edges become too rounded. So the recipe I have used here is somewhere in the middle.
The next day, (day 2), I quartered the dough and then one at a time, I rolled the dough out and cut and baked the cookies. That process takes a couple of hours and is illustrated below. Click on the images for extra details.


Flour the surface well and use a thin metal spatula to lift the cut cookie if it gets stuck to the work surface or roll the dough out between sheets of waxed paper or parchment.
After cutting and rolling out the cookies I bake them at a slightly higher temperature for a shorter length of time than most recipes call for. I found that 375 degrees for 8-9 minutes gives me the just slightly golden color I like. Don't forget to turn the pan half way through baking to maintain an even color.
When all of the cookies are baked and have had plenty of time to cool, I put them into a large airtight container for the night.
(Day 3) Decorating Day!


After making and coloring the icing for flooding, I fill one piping bag with a thicker version of the icing. It's just a little bit more stiff so that it will hold its shape when piped onto the edge of the cookie creating a barrier that will keep the flooding icing from running all over the place and making a nice clean edge. Use a pint glass to hold the piping bag for you while you fill it. Fold the bag open and over the edge of the glass, it works like magic!

I found the icing recipe at Stuff By Stace. I usually use Wilton food coloring to get the intense hues but I made these beautiful colors with Kroger Neon Food Colors. I was impressed at the depth of color I was able to achieve with this brand.
To flood the cookies I add enough milk to the icing to get a consistency that melts back into itself within a few seconds when drizzled without leaving marks on the surface.

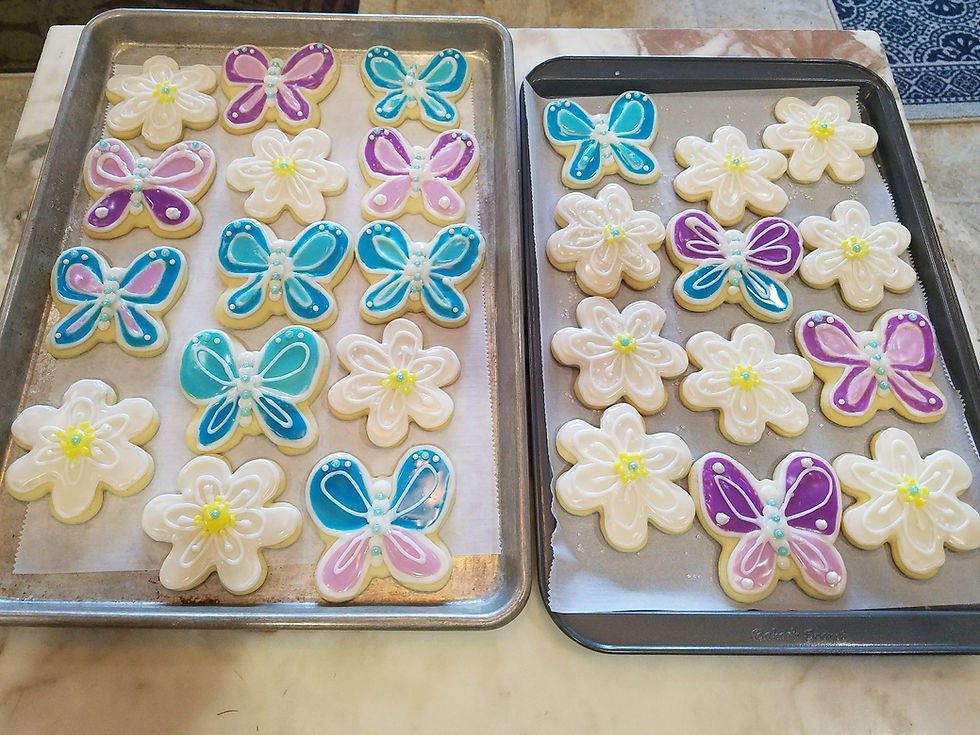
I love that these came out so colorful and whimsical. My daughter and her husband are quite artistic!


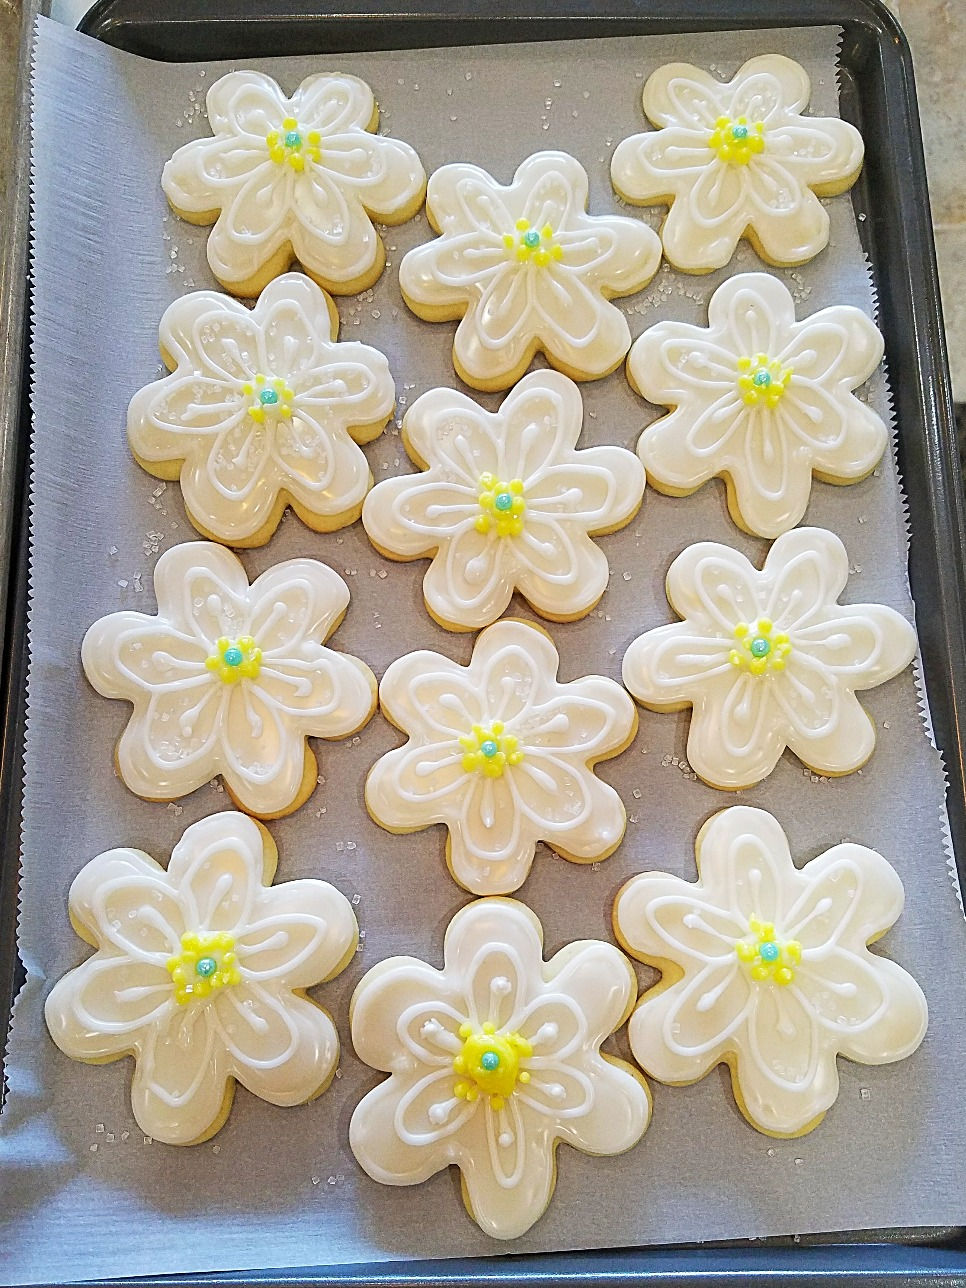
I had decorated these white daisies before they came to visit.


Aren't these fun! We used large blue pearls to enhance the body of the butterflies and the centers of the flowers and some small and large white pearls to enhance the wings. There was literally no end to the combinations we could come up with using so many colors.
As the cookies dry overnight, the colors melt together and soften bringing out subtle details. It always amazes me how different they look after drying. The icing recipe I use is a glace' really so unlike royal icing, The cookies retain a satin like sheen even after the high gloss goes away. In the morning they are ready to box up or wrap in individual clear cookies bags for sharing.
Are you ready for spring! Easter is just around the corner.
Happy Spring Baking!
~Melisa
Spring Butterfly and Daisy Sugar Cookies
Instructions
For the cookies
2/3 cup room temperature real butter
1 cup sugar
1 egg
4 cups unbleached all purpose flour
2 tsp salt
3 tsp baking powder
1/4 cup milk
1/2 tsp real vanilla extract
1/2 tsp almond extract
Mix the butter and sugar together then add the egg and mix well.
Add the salt and baking powder to the flour.
Alternately add the flour mixture and the milk and extract to the butter/sugar mixture, mixing well with each addition.
Refrigerate dough for at least one hour. I refrigerate overnight.
Roll the dough between 2 sheets of parchment or on a floured surface.
Cut with cookie cutters and place cookies on a cool parchment lined cookie sheet.
Bake for 8-9 minutes in a 375* oven turning the pan around half-way through
For the Icing
4 Cups Powdered Sugar
6 Tablespoons whole milk 6 Tablespoons light Corn Syrup 1 teaspoon real vanilla extract
I use a whisk to combine sugar and milk until it's smooth, then stir in corn syrup, extract and food coloring until I have the color I'm looking for.
Starting with completely cooled cookies, pipe an edge with a small round tip and a disposable piping bag with medium firm frosting. When when the edge is dried, flood the cookie with a fairly thin (runny) texture of frosting using a small spoon or the tines of a fork.
Allow to dry and then decorate the top as desired.


Comments