

Exploring with Edna! Lighting Upgrade Guide
- Jan 9, 2022
- 5 min read
Updated: Jan 17, 2022


Hello Everyone!
This is going to be a guide to lighting upgrades for an 1987 Dodge Raider/Mitsubishi Montero 2.6L with a Weber carburetor and standard options. Otherwise known as a generation 1 Montero, Pajero, or Raider.
On todays post we are going to talk about lighting in better detail. Why we upgrade is important. My personal decision to spend money on this project stems from the idea of knowing where to go in the dark. LED is a great way to do this as they use less power then conventional and are much brighter. They also have a much longer life compared to traditional bulbs.
They can be used in many ways, while on the trails, when lighting the camp ground, or working on another car etc.
Bulb color is a personal choice to note as well. I went with white output however some folks prefer yellow output foe fog lights and so on. Certain colors can help with different driving condition. In the end they have bulbs of many colors for folks to express them self's or for what they want them for.
When it comes to wiring please use proper gauge wiring for the load you put on it (Amperage/Wattage). For instance the wiring to the fuse box needs 10 gauge wiring while the rest of system I can use 16 or 14 gauge without pushing the limits of the wiring. I will attach some images below.
Please continue down below for more info. If you like what you see please like and subscribe has it lets me know people find this helpful.
Thanks,
Edna
*Please note these are not/maybe the exact products used but are the same compatibility. Please pick out and confirm that the items you like will work with your install. As you may have a different setup or additional options.*
Part 1-General Updates for Future Additions
The video below shows my setups test layout in the Raider. It is a completely functional setup other then I had to fiddle with the fuel pump relay that it would only turn on at a certain voltage instead of the keyed on state via relay.
The image below is my listed specifications of my amperage draw and the ability's of the wiring in the system. Please note when you go ordering lighting for your rig it may list a crazy number like "2000 watt lighting!" however the folks that make lighting can mean that it is 2000 watts equivalent and due to it being LED it will use much less power. In this way you should always measure your amperage using a volt meter to get a accurate rating of the proper wattage draw of your lighting. FYI KO=Keyed Off and this image isn't fully updated after a few changes to the system.

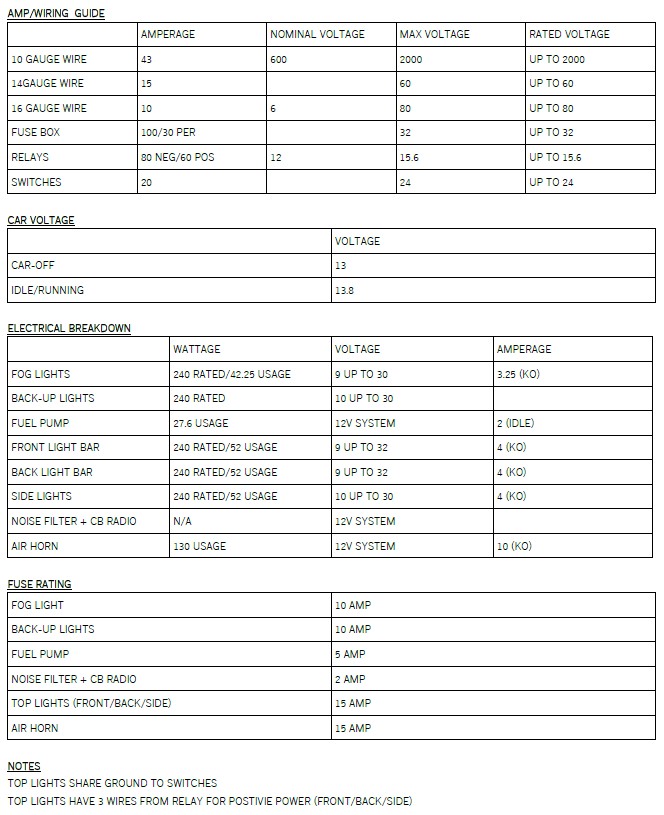
The image below is the gauge of wire I am using in the system. It is critical to know what gauge of wire you have where as you don't want to go starting fires now.


Engine Bay
X2 Battery Connectors (Quick Disconnects)


I installed a quick disconnect to make battery removal easier for future changes.


I installed a fuse box to make the addition of added devices not as dependent on the stock wiring.


X1 Wiring (10 Gauge Wire for Battery to Fuse Box)


I use 10 gauge wiring for the wiring between the battery and the fuse box.
X1 Wiring (14 Gauge Wire for Fuse Box to Add-Ons)
I use 14 gauge and in some areas 16 gauge wire for wiring from the fuse box to the other parts of the system.
X1 Connectors (Heat Shrink Butt Connectors)
A good box of heat shrink connectors.
x1 Connectors (Heat Shrink Variety Pack Connectors)
A good box of heat shrink connectors.
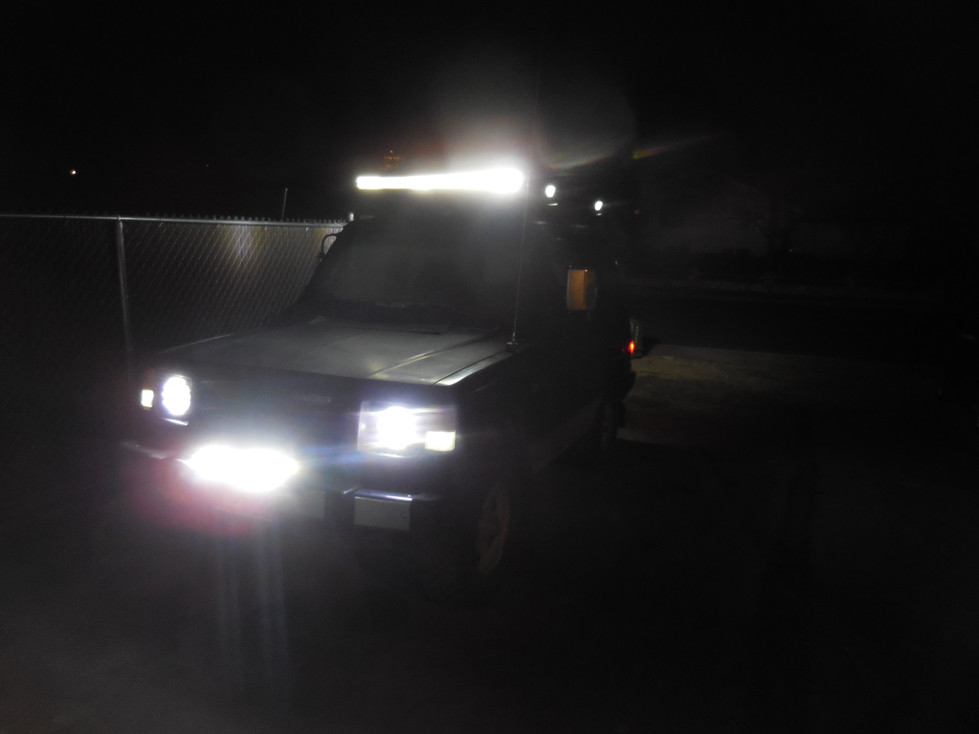
Part 2-Top Lights Additions
Front Lights


42 Inch curved light bar and also added support brackets to strengthen the bar.


Side Lights


Small but efficient pod lights for the side.
Rear Lights


42 Inch curved light bar and also added support brackets to strengthen the bar.
Interior
X1 Switch Panel (Made my Own Holder)


Added control switches for the top lights.
Roof Rack
X2 Waterproof connectors (One for Ground and One for Positive)

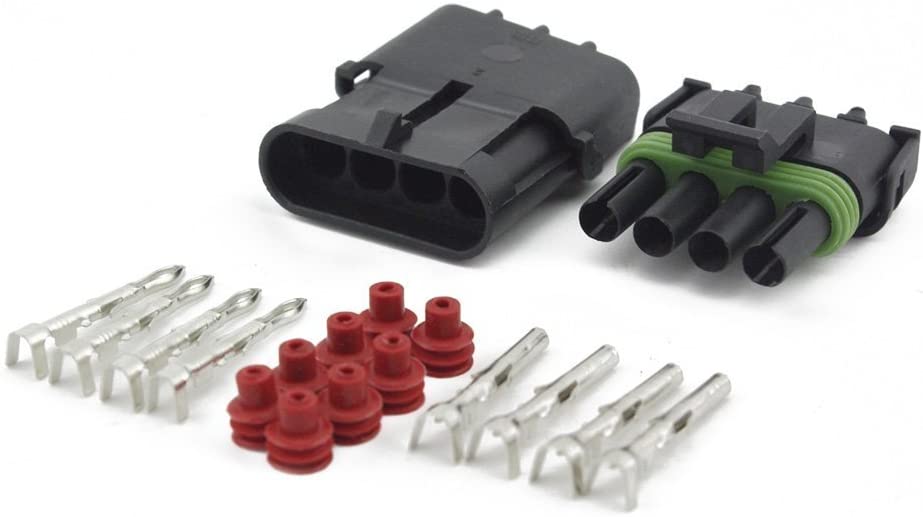


Added connectors so that removal of the roof rack is possible if needed.
Part 3-Stock Light Conversation
Front Lights


X2 Turn Signals (LED 1156)
X2 Running Lights (LED 194)


7 Inch round LED headlights.
X2 Head Lights Mesh Guards (Optional)
Mesh guards not needed but they look good. I had to use JB weld to attach the mesh guards on the headlights. I painted them after to make it look better.
Side Lights


X2 Running Lights (LED 194)
Rear Lights


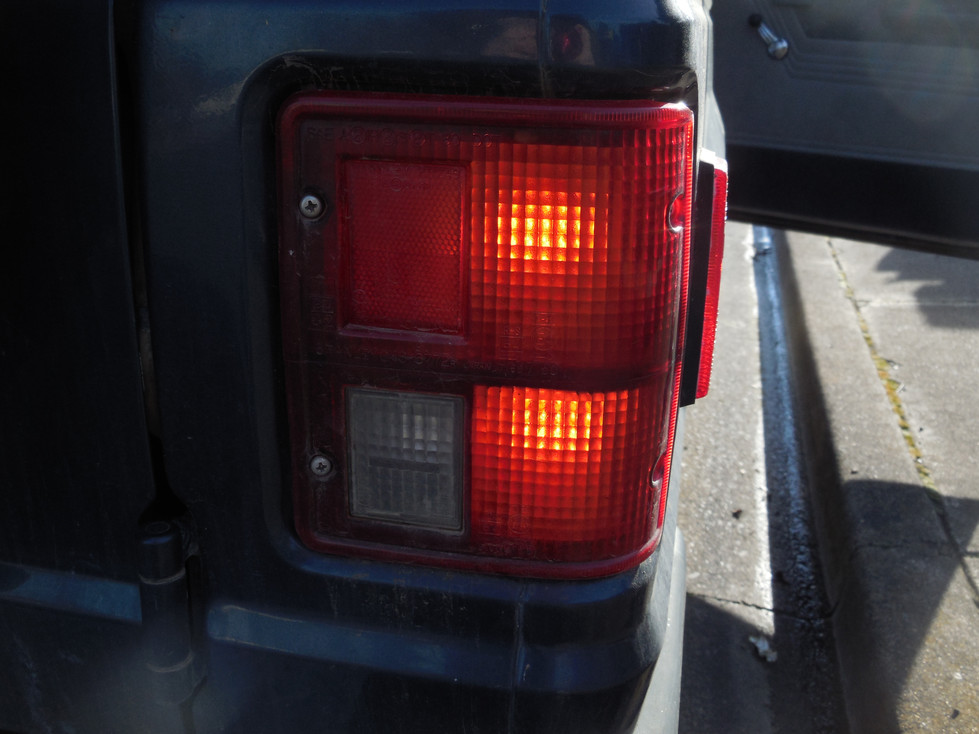


X4 Running/Stop Lights (LED 1157)
X2 Reverse Lights (LED 1156)
X2 Plate Lights (LED 6253)
Interior
X2 LED Relays (Updated for Proper Operations)


The lights will not work properly without updating the relays that are under the driver side foot well area.
X10 or X12 Warning/Status Lights (X12 if Auto Transmission vs X10 Manual Transmission/LED 74)


X3 Defrost/Hazard Lights (Traditional Due to Size Limits/T1 Bulb)


X7 Gauge Background Lights (LED 194)


X3 Console Background Lights (LED 74)


X1 Dome Light (Replaced Stock)


An easy to install light that is much brighter then stock.
Engine Bay
X2 Negative To Positive LED Converters (Needed to Make the Headlights Work)


This car uses negativity switched headlights and you need to use these to make positively switched headlights work.
Part 4-Tips and Troubleshooting
LED lights have a polarity and therefore can be installed backwards. If the lights don't work try flipping the bulb around.
My added lights are controlled via switches which get power from relays. The relays have signal leads from running lights being turned on or reverse lights being on. In this way my added backup lights turn on automatically when in reverse. I can use my top lights only when running lights are on and they auto turn off if you turn off the running lights. This works for me but some folks may choose differently as a simple lead form the battery and a switch could be good for some.
Please also take note that the LED headlights are much brighter and at least in my opinion should be aimed after replacement.
My last thing to mention is that LED lights run cooler to point that in serious cold environments they may not melt the snow/ice build up. So be prepared to have to clean them off if they are getting snow build up for example.
Part 5-Summary
There is a total of 50 lights on the car that I have replaced which means only 3/50 are still conventional. That make my rig 94% LED converted. The only lights that are not LED are the defrost/hazard lights. I may see if I can fit an LED bulb in these spots. Overall I am very happy with this switch and the light output for the exterior and interior is well worth the time and effort. I will also have a video uploaded soon to my YouTube channel showing these changes in video and going over all the steps listed above.


*This is just a general guide that can help if you have specific questions I don't mind trying to help please comment and I will try to answer your questions*


Comments